Monday, February 28, 2022

      I know this is a much-neglected blog I decided to get back to it! I entered the Pattern         Review activewear contest and actually, for the first time, won! It's the Waffle Patterns Momjii walking jacket and this is a piece of the review:

I made this jacket for long walks and hiking in the Poconos where I have another house and we're retiring there in the next year. Lots of cool trails up there and we live in a very hilly neighborhood.
I made all the pockets. This included a sleeve ticket pocket with zipper, a breast pocket with zipper, a pocket with exposed zipper and a pocket with a zippered pocket over the hand warmers. This gives me room to carry my iPhone, vax card, ID, a credit card if needed and lots of snacks. Pretty much anything I can think of!
I like the handwarmer feature as it will get my hands out of the rain if needed.
I made the hooded version as I've frequently get caught in a flash rainstorm there!
The only thing I alteration I made it lengthening the sleeves by 1 1/2".
Also, one of the pictures shows it open so if it gets warm it's not an issue!

I've entered many, many contests but this was a first! The pictures are from my neighborhood in Woodbridge, VA but I love long walks in the Poconos of Pennsylvania, so this struck me as a perfect thing to make. Since we're on Lake Wallenpaupack I think I'll use my Discovery Trekking outfitters gift certificate for some swimwear! I'm beyond excited!

Anyway, I'm back and promise to keep up this time!


Saturday, May 21, 2016

Style Arc Romy Jacket

I am totally taken by Style Arc patterns. They are drafted extremely well and the fit is perfect! Well, except for the full bust adjustment I need to make but I'm quite used to that at this time. I just can't have enough jackets these days. It's been totally soggy around the DC area lately and this is a perfect jacket for this season in this part of the country.

I'm standing in front of the Studio Theatre in DC in these pictures. I will say the neck is pretty tricky. I found the best approach is not totally construct the collar before attaching.


I did line this. The pattern didn't call for it but I thought it was a good idea. The fabric, an all weather 2 ply Supplex from Seattle Fabrics needed it anyway. I also got this lining from them - a good nylon lining for outerwear. Also got the separating zipper and toggles from them, the cord came from Amazon.
 
This jacket has raglan sleeves which makes it easy to set. It has a belt that attaches with belt loops (I love my Babylock cover stitch machine for those) and it has a drawstring in the hem.
 
 
The pockets are box pleated. I decide to make use of my Kamsnap press and use snaps to close the pocket flap. I also used them on the neck snaps.
 
 
Upon leaving the theatre the temperature dropped! So time to snap closed the collar!


This was a fun jacket to put together! I can see making it again, maybe a different color, maybe with a hood. I totally recommend Style Arc! And frankly shipping from Australia isn't that bad - my 2 - 3 weeks for super saving shipping. And our dollar is  pretty strong against theirs right now!
 

Monday, November 9, 2015

Ziggi and me! The Ziggi Biker jacket!


To answer this question up front – no, I don’t have a motorcycle. But I couldn’t resist making the Style Arc Ziggi Biker Jacket. Kind of an odd choice for my first Style Arc pattern but I’ve been fascinated with this jacket. The draft on these patterns are legendary so I thought I would give it a try. I’m definitely a convert! Just made the Issy knit top and love that too!


This is what it looks like zipped up:


The back is pretty interesting. It has a peplum on it to give it some shaping and ease:


My wonderful Mother in Law gave me a very generous birthday present and it was enough for the leather of this jacket. Actually I have a whole lot left as I ordered an entire cow hide! I spoke with a very helpful sales person at Hide House and she guided me to the correct leather. It’s called Moto so you can guess it’s pretty thick. I did say I wanted something suitable for winter – this sure is!

I have to say Style Arc is not really great on directions. But there were lots of tutorials out there to assist me on this. This pattern is not for the faint of heart!

As shown in the illustration I quilted the shoulder and sleeve top. I thought that gave it an extra designer touch. The zippers came from Wawak and the lining was a Bemberg Rayon Twill from Gorgeous Fabrics. It’s a heavier coat weight lining. 


There were a few tricks I learned about working with leather. If you get unintended sewing holes of course they don’t just go away with an iron like with a woven. As a matter of fact you can’t iron the stuff anyway! I used Leather Weld to fill the holes and a leather conditioner to blend them in. Worked quite well.

To get the seams to be easier to get through the machine I used a skiving tool to shave the leather down in bulky places and a rubber mallet to sort of pound seams down. My Bernina B790 got through the jacket with little complaint.

Also adding the lining was a bit different. I couldn’t bag it through the sleeve seam as I would just about any other jacket so I left the opening at the hem and tacked it there.

This jacket has a total of five zippers on it. One for the front, two for the pockets and two for the sleeves. That’s quite a bit of hardware. 


Well, it was cold enough to wear it today and one of my coworkers asked me if I road my bike in or drove a car! Of course I had to answer “what bike”?

Thursday, September 10, 2015

A clock for the lake house sewing room!

I wanted a nice clock for my Pocono sewing room. This design came from Emblibrary and I did it one hooping with the maxi hoop on my Bernina B790. The quilt background was done on my Bernina B580 using some quilt scraps. I found the frame, plexiglass and clock kit on Amazon. This room is really coming together!

Sunday, August 30, 2015

Let's hear it for the wrap dress! 40 years and counting.....

For those who don't know this the wrap dress is now celebrating it's 40th year. It's a style that looks great on everyone it's obviously a classic.

I am in possession of a book called "Sew Many Dresses, sew little time". I saw it and thought that's well worth getting! It has some great pattern blocks as well as a lot of ways to work them.  There is a variation of a mock wrap I thought would be great for the summer. I decided I wanted mine to be short sleeved as I'm not a fan of sleeveless as a rule. There was a pattern block for capped, short, mid and long sleeves.

The fabric came from Elliot Berman Fabrics in NY. They had a great sale on 4th of July and I got some really wonderful fabrics from them as well as a special gift of a yard and half of Nanette Lepore cotton. That project is yet to come.

This is the front of the dress:


I opted to go with a straight skirt with a slit in the back. A bit more modern take.


Lining was a bit of challenge. They showed it with facings. I attached the lining to the front pieces, then added the lower skirt. After that I created the back and attached it. The sleeve lining is bagged and the bottom hem is tacked.

 
I'm really please with this dress. It can be used for all kinds of occasions as well as worn to work and good for a night on the town after!
 

Thursday, July 9, 2015

G Street Fabrics and demise of clothing fabric stores

Well, I guess it had to happen. G Street Fabrics is closing both of it's stores in Virginia. The only remaining one will be Rockville. Honestly, three interstate highways to get there will probably make it too tough to attempt on a regular basis. Centerville was on my way home from work with a minor detour.


For those of us who love to sew clothes this will be a bit of a problem. We have an amazing amount of quilt shops around here but the clothing fabric stores are on the downslide. We lost Fabrics Unlimited in Arlington, Couture Fabrics in Alexandria, Curran Square Fabrics in McLean and now this. Exquisite Fabrics, formerly in DC is now in Culpepper, VA.


Guess it's time to go check out A Fabric Place in Baltimore and take a trip to Culpepper to check Exquisite Fabrics new digs. And there's Sew Smart Fabrics in Scranton, when I'm up there, to check out. After boating season that is. And Manhattan is only two hours from the lake house so there is the Fashion District there.


And I guess online will be the other option. I like when I know there's a brick and mortar attached although I know that's not always the case.

Wednesday, July 8, 2015

And idea for Jeans and how it went

I entered these into a jeans contest and of course I didn't win. I'm never optimistic about winning because the group of people who enter are extremely creative. The fun thing is looking at what they do and stealing ideas for the future!


The base pattern I used was one I self drafted. I took several classes in drafting and decided I needed to give it a shot. I did use my Bernina My Label jeans pattern for things like pockets, yokes and other details. I looked a Jalie 2908 for reference for the cut of the legs.


For fabric I used this really nice denim from G Street Fabrics. It was 97% Cotton and 3% Lycra so not a whole lot of stretch. I did buy some stretchier denim from Mood but I'll be I'll be using it to try out the Jalie pattern in the future. I was suspicious it wouldn't meet the 95 Cotton 5 Lycra requirement.

This is the front:


This is the back:


I had this fairly nice soft black leather blazer with a torn arm. So far I've cannibalized it to make details in a hounds tooth skirt and for the yoke and pocket trim on these pants. 

I recently bought this snap press from KamSnaps as well as pliers to remove snaps that don't work out.
Wow is this thing heavy! Of course I got it in powder blue! I find the bottom of snaps work quite well as rivets.  I used the leather as trim for the pockets:

I interfaced the leather with a medium weft interfacing and lined it with the same fabric I used for the pockets:


My embroidery for the back pocket and front and back leg was Dressed in Damask from Emblibrary. I've used it before and I just love how elegant it is. My Bernina B780 embroidered this denim very easily.


My topstitch thread was from Wawak. It's a huge spool and I'm sure I'll eventually have to figure out who to will it to! It's enough for several generations!


My setting for the picture was the dock of my Mother in Law's house in Cocoa Beach, Florida. I love water as a backdrop! And this was a nice break from Winter. These were taken in March and WOW that was a wild month in Pennsylvania! However, when I got back to Virginia Spring has seemed to arrive.

Thursday, June 18, 2015

Lake Wallenpaupack clock for lake house

Wow, have things gotten busy! Well, I'm back...

Anyone who was at this house when my parents owned it probably remember the cuckoo-cuckoo clock that was once there. People either loved it or hated it. It was a cute clock but some found the sound annoying. It's down at my Virginia house now and needs to be repaired. We figured when it's up and running it will be another sound for Elvis the African Grey Parrot to imitate.

We needed a clock for it's place. I was at a Bernina Club meeting at G Street and they showed how to make an embroidered clock. Why not! I ordered the kit and started work on it.


I used the stitch regulator for the background of the clock. It was fun using it to stipple. Using the Bernina Designer 7 software I used the wreath tool in the software for the creating the numbers. As far as the embroidered map went I scanned a map off of PP&L's web site of the lake and digitized it. There is a small heat set crystal where Paradise Point is.

I didn't like the exposed front sides of the two pieces of plexiglass so I bought a frame to put around it.

When I was finished I realized I could but a piece of plexiglass and a frame just drill a hole in it for another clock. I want to make a sewing themed one for the lake house sewing room so once I clear a few more things off my plate I'll be making one for there.

Thursday, April 2, 2015

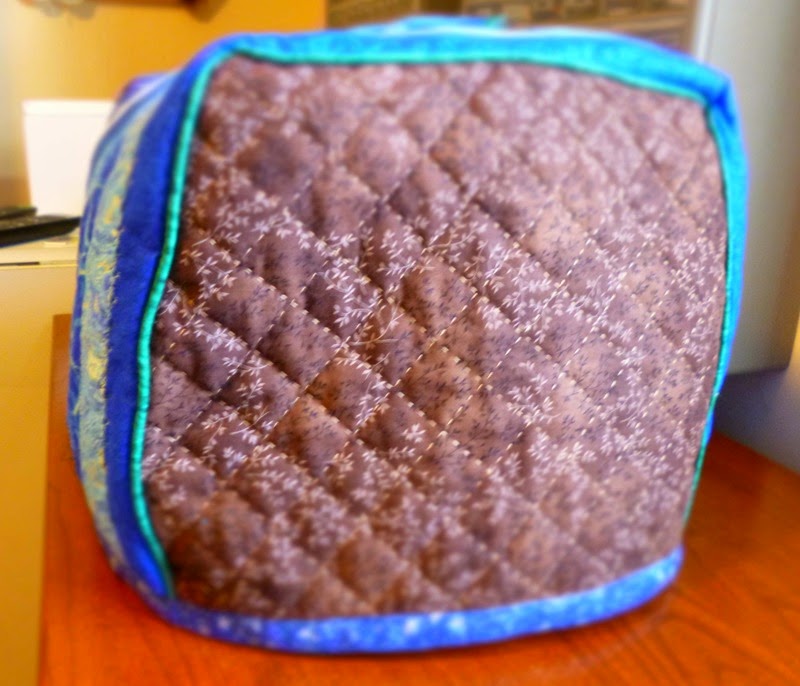
A little more sewing room luxury cover for my Coverstitch Machine

The only thing that I didn't like about my Babylock cover stitch machine was the extremely cheesy cover that came with it. Same with my Enlighten serger. They are made out of flimsy plastic and not at all esthetically pleasing to look at.

The Enlighten lives in my Rockler cabinet so there is no need for to have a cover but the cover stitch sits on the Gristmill cabinet when not in use. Anything that visible needs a nice cover!

I made one for my Sashiko, who sits on the antique sewing cabinet that belonged to my Grandmother and one for the Bernina serger living at the lake house. So time for the cover stitch to get one.

I used jelly roll fabric to make the front, top and back. I used the cheesy plastic cover as a pattern. This was done on Bernina B580 and it was fun using the decorative 9mm stitches the machine. The piecing went perfectly using the 97 foot and guide. Best 1/4" seems ever! The logo was done through the Bernina Designer Plus 7 software.

I used a close font to their log and they added the oval around to emulate it. I've got the Bernina one, which I have on my serger cover in Pennsylvania as I like the label them with who made them.

This is how the front and back look:
The sides were done with my Saskiko machine:
This is the one I did for the Sashiko machine. It was one of the first ones I made so it's not quite as nice as the cover stitch cover. But it does nicely serve the purpose of keeping dust off the machines!

Friday, February 13, 2015

Okay, so now up.....

I did acceptably well with the Bargainista Fashionista contest. If I figured this right I was fifth out of fifty two. It was a pretty amazing group of designs so that feels good to me.

So once again something I want to do is on at the right time. I've been wanting to make some more jeans for a while and I have some leather scraps left from my destructed leather coat - it had a torn sleeve so I decided it should be put to good use as trim. Also want to embroider on it.

I have some nice stretch denim from Mood but I think I'll got to G Street tonight to get some non-stretch. I think my pattern (the 5 pocket jeans from Bernina My Label) will work better with the non-stretch version than the stretch version. I'm thinking of picking up the Jalie 2908 Jeans pattern for the stretch fabric when I get to that.

It would be nice to have a few more pairs of nice jeans. I can actually wear the to work on certain days.

Sunday, February 8, 2015

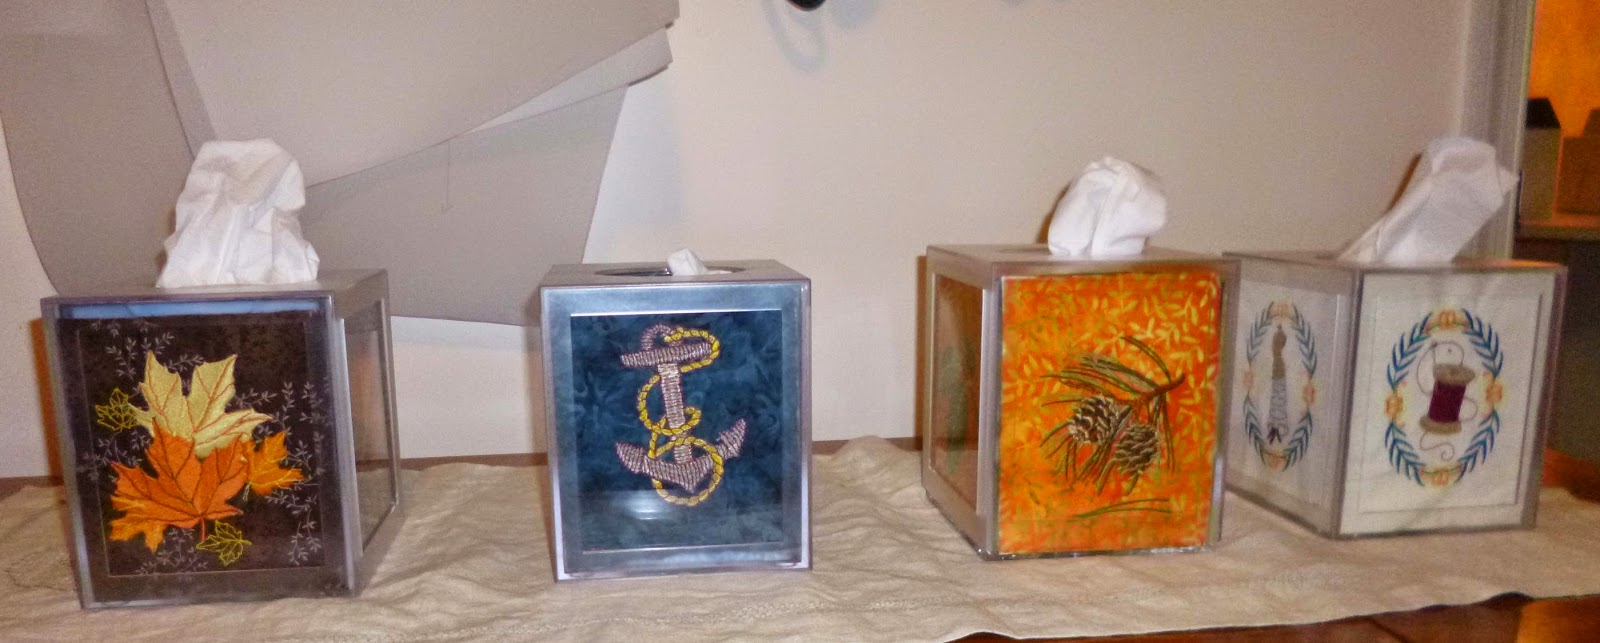
Embroidered tissue boxes - when I couldn't find ones that matched well enough

I'm kind of a stickler for personalization and coordination. Between the two houses that means six bathrooms between them. I'm fine with two in the Virginia house but I never found one I liked for the master bath when we redid it a few years ago. Same with the lake house.

I wanted to match one for the master bath in Virginia with the shower curtain and matching towels I embroidered when we completed that renovation:


Using the same type face and a little more detail this was the box I made to match:

 
All four sides are the same on this one. I used some linen I found from a project I never got off the ground. It worked quite well.
 
The other four, three for the PA bathrooms and one for the PA sewing room were done with embroidery from Emblibrary. The ones for the white and green bathroom match the hand towels I embroidered and the one for the gold bathroom I found at Emblibrary.
 
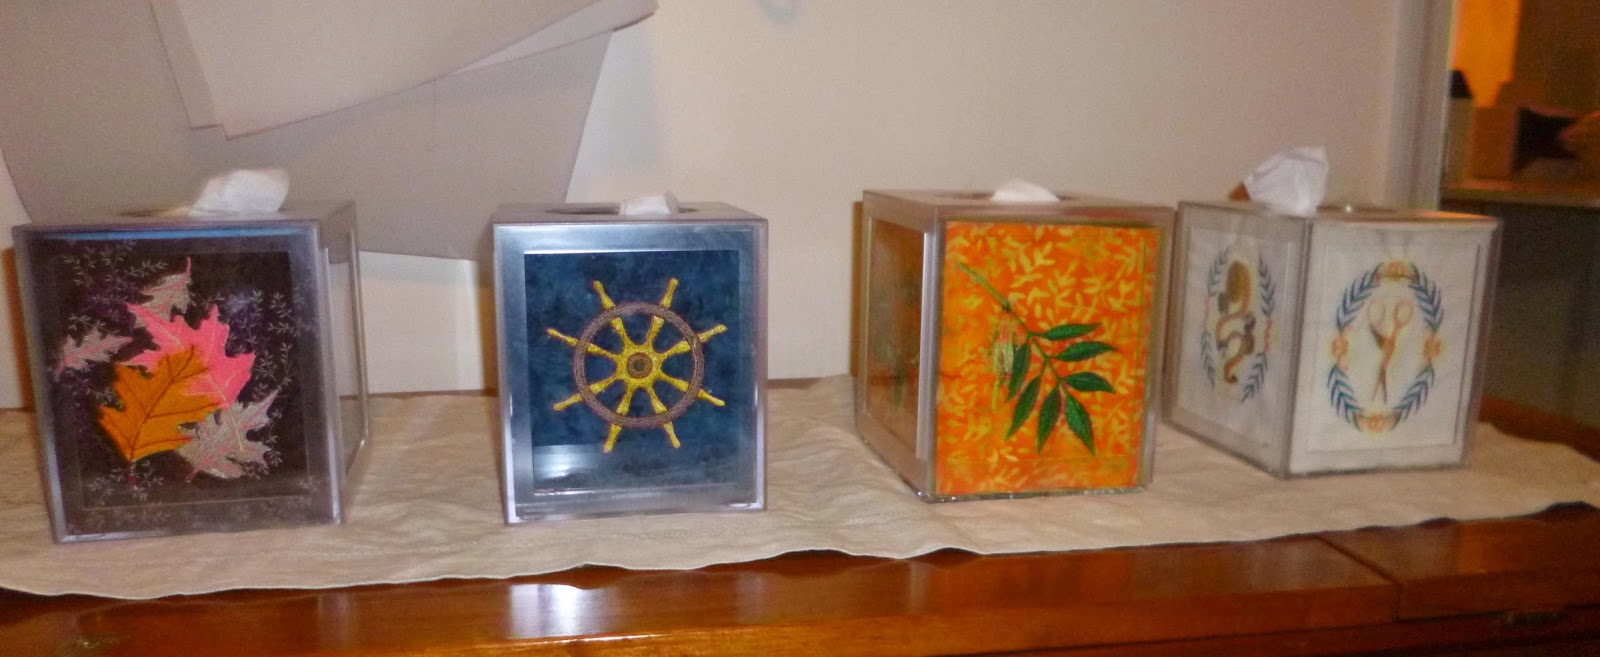
These have four different faces so here are the four sides of each box:


I used quilt cotton for the three bathrooms and some of the linen I found for the sewing room one.
 
The boxes came from Sew For Less. They are acrylic and anything can be added to them - pictures, embroidery, anything flat. This was a fun project and a bit of a break from clothing which I will be returning to after this. I did wanted to make sure I had these ready for my next trip north.


Saturday, January 31, 2015

My take on the Burberry Kensington Trench

Well I did enter the Bargainista Fashionista contest. I've had this trench coat fabric around for a few years and decided this was a good excuse to get it sewn. We were to take an expensive garment as inspiration and make our own version of it for a lot less. Challenge on!

This is my inspiration:


My pattern was my venerable Bernina My Label pattern but I did see a Burda and Sewaholic pattern that could be used instead. The good thing about my pattern was I already made it once (a way less complicated version) so I knew it fit quite well.

I did some snoop shopping at Bloomingdale's and frankly I think my fabric was even nicer that the original. It came from Michael's Fabrics so no surprise about that. I, of course, couldn't get the Burberry cotton lining but I got some really nice 100% wool from Mood and it turned out to be perfect for this. Once again, I prefer it to the original lining.

I did have to figure out how the collar worked. It has a collar stand that has a clasp on it so it can be closed for bad weather. I found some very nice brass hardware from Ebay which worked quite well as the D rings and tongues on the buckles were brass. Speaking of the buckles the only ones I could find didn't have tongues but Potomac Cobbler  could add them for me. Well worth it! I added the D rings to the belt in the back a-la-Burberry. The buttons and D rings came from Wawak.  I did promise the lady at Potomac Cobbler I would wear the coat in sometime. Apparently there aren't a lot of people that make this request.

I did welt pockets as opposes to the inseam pockets on the pattern. One thing I realized while working on this coat is the fabric was a bear to work with! Nothing turned out to be easy! But I'm very pleased with the outcome.

I also added epilates to the shoulders. I had to draft the back shield as there wasn't one. I also added the straps on the sleeves if it is needed to tighten the sleeves in a storm. Also I noticed they lined the undercollar in the lining fabric so I did the same. Kind of a nice touch.

So here is my version:


And, without further ado, this is the lining:


Okay, so here is the the breakdown of the cost:

$1.90 for D rings
$3.57 small leather buckles
$1.65 for the larger leather buckle
$15 for the tongues for the buckles (they didn't come with theme but a local cobbler shop could put them in. A shout out to Potomac Cobbler in Woodbridge VA!
$1.99 for thread - put it in here because of all the topstiching
$45.00 for the wool plade lining from Mood
$45 for the Coat Fabric from Michael's Fabrics
$2.70 for the brass neck closure fond on Ebay
Total cost: $125.13
Burberry Kensington coat: $1798.00


93% saved!

So that project complete and we'll see what happens next!

Monday, December 29, 2014

Well, next up......

Despite my better judgement and because I haven't done particularly well in these contests I'm entering another one anyway. Why might you ask?

Well there is the fabulous cotton trench fabric I have from Michael's Fabrics and some really nice wool plaid flannel from Mood. I made a trench a few years ago and I really love it but it is definitely a trench for Spring. I want one for Winter so that's why I got the wool flannel - for a lining. I knocked a few other projects out in the mean time (pictures to come) and have been wanting to do this one for a while so I figured why not? It will mimic (to a point anyway) a $2000 Burberry I've always drooled over (not literally of course).

Right now I'm embroidering some tissue boxes for the lake house but this starts on the first  and because the house is closed for the Winter I have no excuse for not finishing this. Frankly

I do need some inspiration. My favorite sewing instructor, my Mom, passed away early December but she loved to see what I was making right up to the end, even after her sewing days were over.

At the lake I have her sewing box. Even in assisted living she was hemming skirts and pants to help friends save money. Now that's inspiration!

Wednesday, November 12, 2014

Sewing room luxury - sewing themed coasters!

I've been looking high and low for sewing themed coasters for my sewing rooms. Alas, none exist. Well, step in my creative side......make my own!

First I had to find blanks. I found these lucite coater blanks with cork backing at All Stitch Embroidery designs. I need to remember this group - they are in Baltimore and I got these in one day with regular shipping.

I then went looking for sewing themed embroidery designs. I really like Emblibrary because they have interesting designs and they are quite reasonable. I bought the Creative Filigree Design pack and picked out the four designs that I deemed most appropriate designs. 

I gave my B780 it's first embroidery workout doing these. Wow is that machine fast!

This was the result:


I made a set for the Virgina sewing room and a set for the Pennsyvania Sewing room. So now the coaster stones with the robins can go back to the living room!

Sunday, November 9, 2014

My new machine and it's Gristmill cabinet!

Since it came out I'm been interested in a Bernina B780. It has everything I want in a machine but the size is huge and I knew it would not fit in my Rockler cabinet. I really like machines in cabinets as they get used more than machines in the closet. I also hesitated initially as there were issues with the 7 series machine. It's now been out for two years so I decided this was the time!
In our house in Virgina if something comes in, something must leave. The organizer I kept my television on is now at the Pocono house and the totally shot chair went out in the trash.

I called Pocono Sew and Vac in Stroudsburg and asked if they took trades. They gave me a great price for the machine, a great trade in for my Artista 630 and terrific financing AND even had it in stock. No way I was not getting it. Between that and my Babylock Coverstitch BLCS2 they are fast becoming my favorite dealer.

At the start it was on my Roberts table with the extended table on it. I made my Deer and Doe Pavot jacket on this machine and it did wonderfully with the thick wool with the dual feed engaged. When I made my denim/leather jacket it was set up for topstitching and the Bernina B580 was set up for piecing the jacket. The topstitching was absolutely perfect!

So enter the cabinet. As my dear Father in Law Jim passed away last August I have to find another place to get a cabinet. I've heard wonderful things about the Gristmill Collection of sewing machine cabinets. I contacted them and told them what I had and received information on what they recommended. I realize the cabinets suggested were too big for my space so I called Jason at Gristmill and we talked about what would work for the space I had. He proposed a Mini+ extended enough to accommidate the B780 and with an electric lift because of the height and weight of the machine. I requested shaker style and a color that would coordinate with the Rockler.

When it was built he called to confirm the stain color. Then several weeks later I was notified the cabinet was ready! 

We decided, since we are less than three hours from Bethal, PA, we would drive up to get it. It fit quite well in the back of my Prius (back seats down of course) and Jason and Colin got the cabinet in the car. We stopped at Wolf's Diner in Dillsburg, PA on the way home. It's a good basic diner, totally recommend!

This is what it looks like closed:


And this is what it looks like open with machine:


This, along with the B580 are the absolute dream team of machines for me!

Monday, October 27, 2014

Deer and Doe Pavot Jacket

As before mentioned I received this pattern as a gift for participating in the Pattern Review Wardrobe Contest. It was a really fun contest and putting things together and photographing them was part of the fun too. I think Colin would agree to that.

I decided as one of the pieces for the Natural Fabrics Contest I would use it to make a Winter coat. This pattern is unlined and made to be mid season but I've pretty much got mid season covered and for Winter I wanted something new.

My fabric came from Gorgeous Fabrics. I got some very nice brown coat weight wool and some black Bemberg lining for it. The buttons were from G Street Fabrics.  I definitely recommend Gorgeous Fabrics - the fabric got here very quickly and it is wonderful to work with.

My first observation when I was doing the muslin of the pattern is that French women are obviously not like 5'8" me. I had to drop the bust point down 1 1/2" and also drop the waist 1". Because I was making it to go over Winter jackets and sweaters I used the largest size, 46, and added 1" of ease to it as well. This fabrics was pretty beefy and definitely benefited by the additional ease.


I came to terms with the Peter Pan collar although I had to think about the first. Not exactly my style but it works on this coat. I also decided the puffy sleeve affect wasn't me and really wasn't this fabric. I made the sleeve as a basic set in with a fairly thin shoulder pad.

I also drafted the lining using the skirt pattern, the bodice and taking into account the facings. That worked quite well.


I found these very cool buttons at G Street Fabrics:


This was my first project on my new Bernina B780. It followed me home a few weeks ago and although it's cabinet isn't here yet I have it set up on Roberts sewing table I bought for machines not in cabinets and it's worked out pretty well in the interim. I can't get over how much the dual feed feature helped on this thick wool! It also made some really nice buttonholes. Having this machine and my B580 as my two main machines is truly a dream combination.

The fact I got both of these jackets done in the month of October feels much like a win already -
so - bring on the Surprise Sewing Bee!

Saturday, October 25, 2014

The iconic jean jacket - Denim and Leather edition

I've done this pattern several times but I thought why not do this for the Pattern Review Natural Fabrics contest? This pattern is a basic jean's jacket.  I know there are several patterns out there for this but I have the program for it and decided to use that. A quick muslin confirmed the fit.


The denim, leather and very interesting lining material came from Gorgeous Fabrics. The denim is some really high quality black denim and the leather is glove soft. I did interface the leather with Pro Weft Supreme Medium-Weight Fusible interfacing from Fashion Sewing Supply. I can't say enough about this interfacing! It doesn't need to be preshrunken and it fuses beautifully. 

For the front I used the leather on the yoke. On the back I used it on the yoke as well as the strip in the back. I also did the cuffs with it.


The jeans thread came from Wawak as well as the buttons. A word about this thread from Wawak. It came in a very huge cone - I think enough for me and maybe a few generations after me. But the price was good. The gray thread looks pretty striking against the black leather and denim.

To fuse the interfacing to the leather I used a cool iron without the steam. It took to the underside very easily. I do have a shoe on my iron so I didn't need a press cloth.

I set up the Bernina B580 with black thread for the denim and leather construction. I put a leather needle in and used the very interesting leather foot - it sort of looks like it's on one training wheel:


I threaded the B780 up for topstitching. I used the jeans thread with a denim needle and put all purpose thread in the bobbin. I used the jeans dual feed foot with the dual feed engaged and it did a wonderful job on topstitch both the denim and the leather.


I did create a lining out of a really interesting looking cotton fabric. I thought it was a pretty nice touch to inside. I didn't flat fell the seams because it was lined.The other modification I made was to make the rounded collar more pointed. Just more my style.


I'm glad I finished before Fall totally set in as it's the perfect weight for that season.

Wednesday, October 22, 2014

Contests, contests.....

I did okay with the T shirt contest but didn't win. I don't mind that because I've got a bunch of new clothes to wear that I wouldn't have had otherwise. As a matter of fact I wore the long sleeved dress to work yesterday. I'm finding some of the T shirts work pretty well with the clothes I made for the wardrobe contest. And my jacket for the outerwear contest is getting a lot of use right now.

Right now I'm working on the natural fabrics contest. I've all but finished the Deer and Doe jacket but I'm making it for Winter as opposed to mid season as suggested.. Currently it just needs the buttonholes cut and the buttons put on. I made a LOT of alterations and modifications and I'll get pictures up shortly. I've acquired a Bernina B780 and it makes really great buttonholes.

The other piece I'm making is a denim and leather jacket. It's a Bernina My Label pattern (not stopping using it until it doesn't work anymore) and I'm doing some tweaks but for the most part it's going to be right on the mark. I'm loving the fact I have my B580 set up for the leather part and the B780 set up for the denim.

Next up is a contest that's sort of like the Great British Sewing Bee. The first week will have a challenge where we get one week to make whatever is announced. Someone will win, some will get eliminated. It goes on in this format for two more weeks then after the last week's challenge the grand winner is named. The teasers make it look like the prizes could be interesting and if I every felt a Project Runway feeling coming on this is it!

Saturday, August 30, 2014

Entries for the T Shirt Contest!

The title of this one is T Shirts for All Seasons.

Like the Wardrobe Contest I decided to take the approach to do the most intricate shirts first and go towards the easiest. That almost worked. Turns out number three was the most time consuming as it's the first time I worked with Bernina Design Works. The Crystal Works was a breeze but the Paint Works had a bit of a learning curve. The good thing was I had a lot of white knit fabric from a recent Michael's Fabrics bundle so I did have the opportunity to play a bit. Now I feel I've got it and there will be no stopping me in the future!

I based this on the Bernina My Label T shirt pattern that has served me quite well. The one big modification I did was a full bust adjustment. I've never thought that to be needed before but it made a big difference in the way the front lays. I used Louise Cutting's technique from her Threads Insiders Industry Techniques #4. It's also on the Thread's Insider site which I find very handy when I don't have the disc with me. This is a really good series for a more experience sewist as it goes through some very useful techniques. Not really beginner level though.

Well here is the first one:

I got some rather thin yellow rayon knit in the bundle and since yellow is not an everyday color for me I though beach coverup! Our PA house is across the street from the lake so I'm not particularly comfortable walking around in just my swimsuit. I took my basic T, lengthened it, put a V neck on it and shortened the sleeves. I could not resist embroidering the silly crab on the hem. Of course I had to take the picture at the lake on Cyber Seas.


For the next one I lengthened the shirt, made it with slits on the side, made it sleeveless and added the embroidery from Bernina's Tuscan Garden collection using the Mega Hoop on my Bernina 630. This was another fabric from my Michael's Fabrics bundle. This one was a little beefier. I thought this was a good Summer dress and something that can be dressed up or down.


The third one was the basic shirt but I embellished the sleeves with Paint works and Crystal Works. This had to be done on my B580 as it's the only machine I've got that's capable of using this program. The collections was Bernina's Loop-D-Loop which I thought looked like fun.


The Edding pens that came with Paint Works ran out pretty fast so I bought a whole bunch of Tuskineko pens in all kinds of colors from Amazon. They came highly recommended from the Design Works Yahoo group. I then punched the template for the crystals using the Crystal Works program and made four sets, 2 each for the sleeves. It was a lot of fun and I can see wanting to use this more in the future!

The forth one was a basic T with the neck scooped a bit and out of the fabulous nicely heavy wool knit from Mood. I'm not wishing Summer away so quickly but this is going to a nice sweater for when the weather gets colder.


The fifth one also fell out of my sequence on complexity idea. I was going to see if I had time for this at the end - the requirement was four but I shot for six. This cotton knit fabric came from G Street and it's a nice substantial weight. I took one of the curved rulers I got with my pattern design kit from Wawak and made the curves using the ruler. I then faced them and trimmed the facing down. My nice new Babylock cover stitch did a very good job of following the curves to cover. Then I used some very small black buttons to tack the sleeves together. The neck on this one was scooped a bit as well.


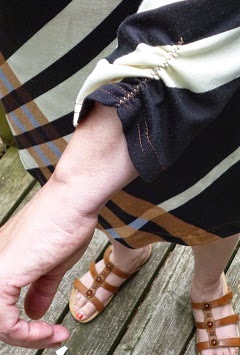
Here's the sixth one. I didn't get the cashmere knit fabric from Mood in time so into the stash I went. I found this wild knit fabric I got from the G Street remnant pile years ago and I though dress! I can always use a casual dress! I lengthened the shirt but 12 inches and "ruched" the sleeves a bit. For the ruching I zigzaged over the round elastic and then pulled it tighter. Voila! Instant ruching!


So I made it! Six shirts this quickly makes a very busy month. Wish me luck!